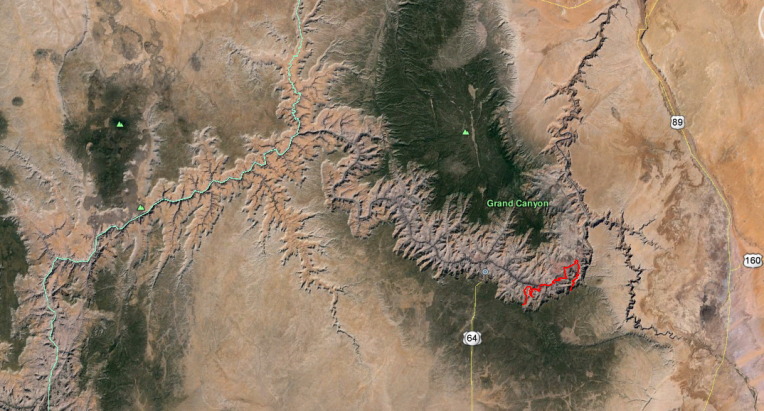
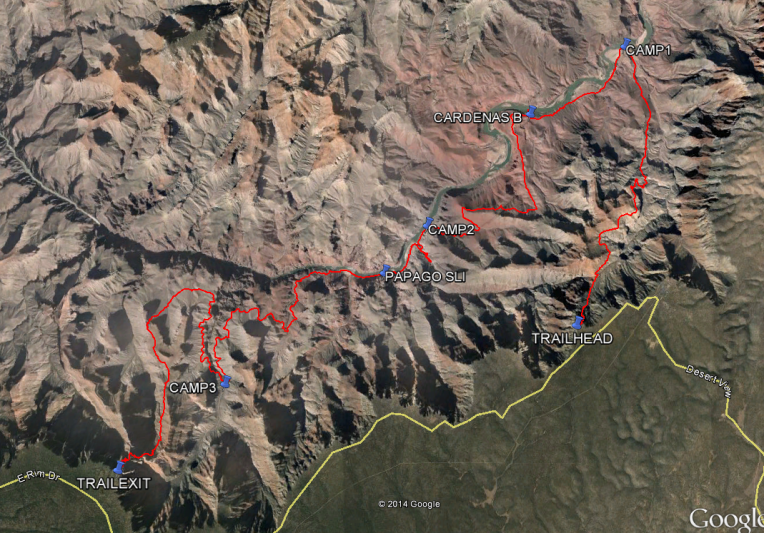
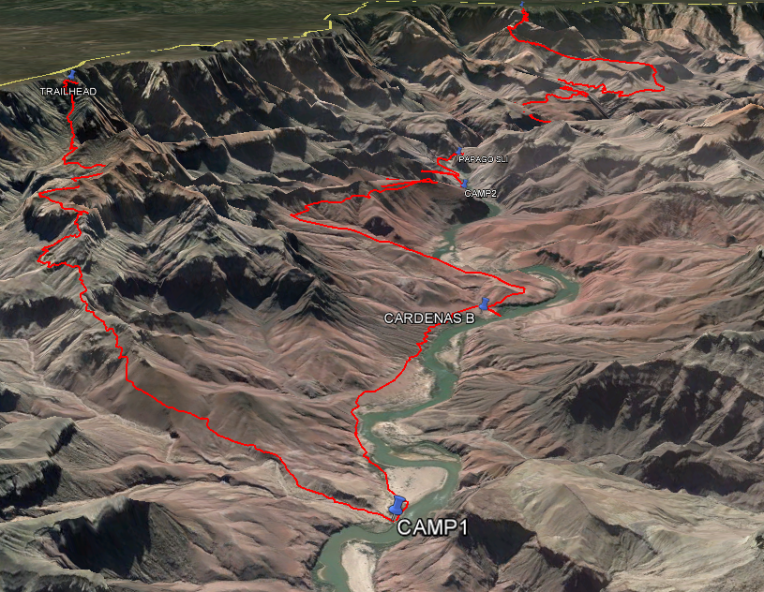
We recently completed a 3 night, 4 day 33-mile backpacking trip along the Escalante Route in Grand Canyon National Park. What drew our interest in this particular route was that Backpacker Magazine hailed it as one of their “Best Hikes Ever,” saying that “there’s no better route for the access, solitude, and scenery.” Granted, we had just completed a 70-mile epically beautiful and hard-to-top hike in Glacier National Park (Montana) referred to as the North Circle Route, so we knew that any backpacking trip would struggle to even come close to how amazing North Circle was… but we also knew that, in order to avoid comparison, we should do something 180 degrees opposite from Montana. So after a handful of options were on the table along with some quick deliberations, Escalante had our hearts.
A couple of quick things to note. The Escalante Route is not a maintained trail by Grand Canyon NP. In fact, it is technically not a trail at all. It is an unmarked route in which GPS, compass, map, and orienting skills are necessary. But, and this is a big BUT, the route appears as if it has had so much traffic over the years that a clear trail is visible the entire way. Even more, in areas where the trail may not be completely visible there are cairns leading the way. I don’t want to give you a false sense of security by saying that, because the entire route is certainly not for beginners, but don’t let this route scare the pants off of you either.
Also, while there are several ways to access the Escalante Route, we entered at Lipan Point along Tanner Trail to access Escalante and traveled east to west. We exited Escalante via Tonto Trail and Grandview Trail to Grandview Point. This is the exact route that Backpacker Magazine suggested, however we reduced the number of days on the trail from the suggested five to four.
Day 1
Total Mileage- 9.0 miles
Total Elevation Gain- 0 feet
Total Elevation Loss- 4650 feet
Day 2
Tanner Rapids to Escalante Creek Mouth
Total Mileage- 8.6 miles
Total Elevation Gain- 1200 feet
Total Elevation Loss- 1200 feet
Day 3
Escalante Creek Mouth to Hance Creek
Total Mileage- 9.9 miles
Total Elevation Gain- 1200 feet
Total Elevation Loss- 0 feet
Day 4
Hance Creek to Grandview Point
Total Mileage- 6.0 miles
Total Elevation Gain- 3700 feet
Total Elevation Loss- 0 feet
Also… if you are interested in our planning for this trip read Planning a Grand Canyon Backpacking Trip.
If you have any questions about the Escalante Route… feel free to write to me in the comments.
Peace…
Brandon


Those are some of the best pictures I have ever seen of the Grand Canyon. What kind of camera did you use? It must be a nice camera. I have been wanting to do that route for a couple of years and now I am totally inspired! Thanks for the fantastic write up.
Fantastic Tom! And thanks for the response. Believe it or not I just used my iPhone 5S for all of the pictures. We REALLY got lucky with the blue skies and sunshine. I highly recommend this route to anyone. The Backcountry office recommends doing it over five days and six nights… but if you are in great shape and have some legs for elevation… you can shorten up the trip. I would also highly recommend Spring or Fall, as the temps are more moderate. Keep me posted if you do it… and if you have any questions let me know.
5S! Incredible!
I noticed that some people will take the Hance Trail up and not do the Tonto and Grandview trail. It sounds like you really enjoyed that part. Would you recommend not skipping it?
I cant really speak to Hance Trail, but the entire route we took (including Tonto) was spectacular.
can you tell me what map you used? looking at doing this route in march. thanks!
hey jody… thanks for checking out the blog. we used the National Geographic 261 Grand Canyon- Bright Angel Canyon North and South Rims (http://shop.nationalgeographic.com/ngs/product/maps/travel-and-hiking-maps/trails-illustrated-hiking-and-recreation-maps/arizona/261-grand-canyon%3A-bright-angel-canyon%2Fnorth-and-south-rims-trail-map). although the scale was 1: 35,000 … it was sufficient for our purposes. as i mentioned in a few of the posts… despite it being a “route,” there was sufficient wear to easily follow. as you plan feel free to ask me any questions that you have. thanks! brandon
thanks for your help with the map. can you tell me a bit about the papago wall? is that something we will need ropes for? curious about the difficulty of this. thanks!
you definitely do not need ropes. i do not have any climbing experience and i scaled in 45 seconds with my pack on. going down the other side is slower but just use your trekking poles for balance. all in all… an easier wall than i expected.
No mention of the noisy tourists flyovers, or the freaky scary climb from Page (Miner Springs) to Horseshoe Mesa…
thanks for the response ned. we had a few helicopter flyovers over four days but nothing too irritating or notable. maybe because we were there in early spring over Easter? also, we never went to Page Springs and we didn’t experience the freaky climb. but by you mentioning it, maybe I wish I had! 🙂
Thanks for the detailed post! I’m planning to do the same hike in the fall. I normally hike in old running shoes. I’ve done many trails in New Mexico and Colorado that way. Is there any thing about the terrain on this route that would make you think that I’d need thicker/stiffer soles? (Just to show that I can be swayed: I’ve never used trekking poles, but I’ve been convinced that I’ll want them descending into the canyon.) Thanks!
Hey Luke… great question. Here is the difficulty that I found descending down to Tanner and I am not sure if it was really a matter of having stiff soles. It was about 7.5 miles of your feet angled in such a way that your toes will likely be touching the inside of your shoe/boot, crowding your toes. The biggest recommendation is to make sure your feet aren’t sliding in your shoe/boot. Cut your toenails right before the hike. I lost a big toenail after the trip because of Day 1. Overall for this trek, you could probably get by with running shoes, if you aren’t carrying a super heavy pack. The trekking poles are a must, as they will really minimize the impact on your feet/joints in and out of the canyon. Good luck with it! It will be a phenomenal trip.
Cool. Thanks for the response! I appreciate it.
Thanks again for all of this information. I just got back from doing this route. Your detailed descriptions helped me be very well prepared.
Thank you for the detailed post. We used it to do the same trip the past 4 days.
It was very helpful to read all your comments prior the trip.
It was amazing but very hard!
We also did the “freaky climb” so that was a lot of “up” on the last day.
The wall was a little scary for us, as it is not super well indicated on the trail and we had no idea we had to climb vertical rock, that said it was fun and will stay a good memory of this trip.
We really loved our second night st Cardenas. The beach was very pretty and we were the only ones.
The Escalante trail was beautiful, well indicated in most places. Not very used however as we didn’t see anyone from Tanner rapids to the junction with tronto trail except rafts on the river…
The Tronto trail was our favorite part!
Great to hear! I am glad that after this many years the post was fairly accurate. Thank you for using it and for sharing your experience. That’s a really special place.