Wyoming: Wind River Range- Titcomb Lakes to Trails End Campground- Day 4

Wyoming: Wind River Range- Titcomb Lakes to Trail’s End Campground

Total Mileage- 14.00 miles

Total Elevation Gain- 2125 feet

Total Elevation Loss- 3334 feet

screen-shot-2016-12-07-at-6-03-08-pm screen-shot-2016-12-10-at-6-37-04-pm

Our fourth and final day in the Wind River Range area of Wyoming would take us from Titcomb Lakes to Trail’s End Campground.  The previous day threw a monkey wrench into our plans, as we were planning to hit Bonney Pass and take The High Route north for several days.  An expected snowfall would have made our attempt too risky so we opted to exit through Titcomb Basin to Trail’s End Campground.  While this was a massive downer, our trek through the basin was amazing.  The views were nothing less than spectacular.  The big decision that we had for this day was whether we were going to hit the full 14 miles to get out- or – do one more night.  At this point it was really a decision based on how everyone was feeling.

img_1535img_1556img_1557img_1561img_1567img_1574img_1575

This 14-mile trek would add up to some significant elevation changes, both ascending and descending.  To be honest, I was a little surprised that we gained over 2000 feet, but we had not game-planned this route and really did not know what to expect.  Surprisingly, the only reason we had a map for this trail is that on the previous day when we decided to not tackle Bonney we ran into some speed packers who let us take some pictures of their map.  I suppose had we not had their map as a reference we would have still made the same trail out, but their map gave us an approximate mileage and an approximate end destination.  But for the time being, we saw a beach and a lake.  And that ALWAYS means a polar plunge.  No joke, the water temperature was in the 40’s.

img_1581img_5071img_1597img_1598img_1602img_1810img_1607img_1611

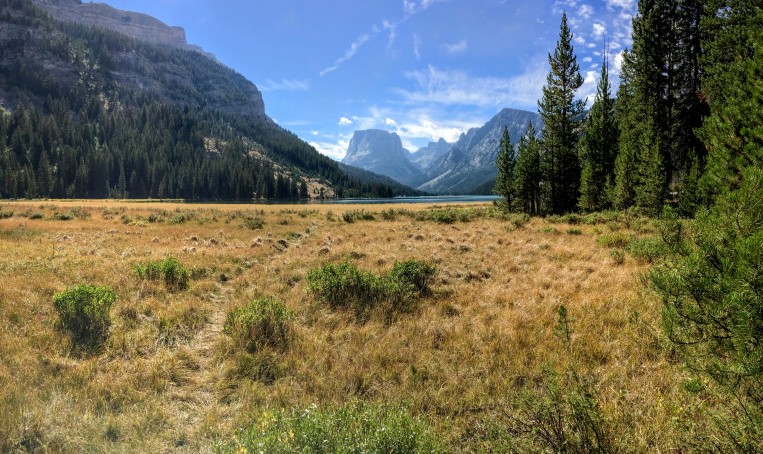
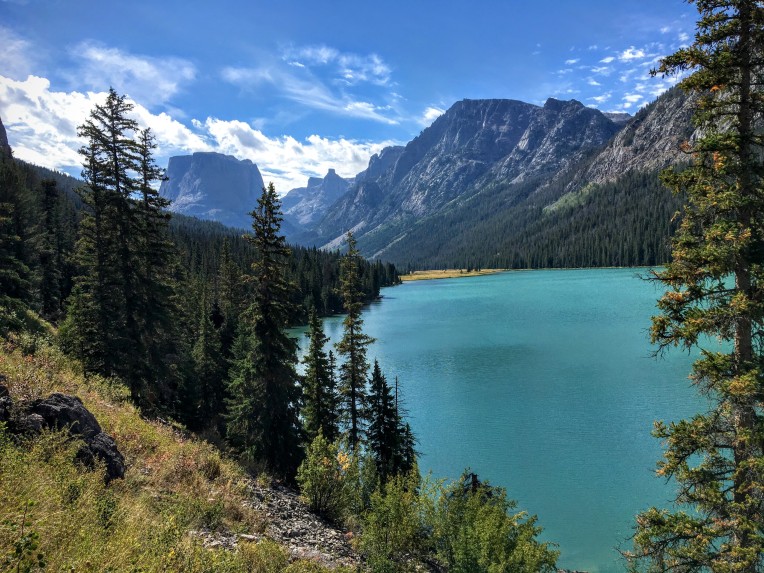
To give you a bit of an idea about this 14-mile hike, about the first half of it (the portion coming from Titcomb Lakes) is amazing.  The entire time I was hiking I thought that it would be a great stretch to hike and camp with my kids on another trip.  Camping at Titcomb Lakes was nothing short of stunning and the views of lakes/mountains was really special.  However, the final half of the hike is not pretty at all.  It is mainly a wide multi-use trail that descends among the trees making for a long, repetitive seven miles.  That was the unfortunate part of this last portion- if you wanted to hike to Titcomb Basin and hit the lakes… it would take a really long and suffocating initial hike to get there.  Needless to say, I didn’t take a lot of pictures the last seven miles.

img_1639img_1641img_1647img_2369img_1659img_1672img_1675img_1676

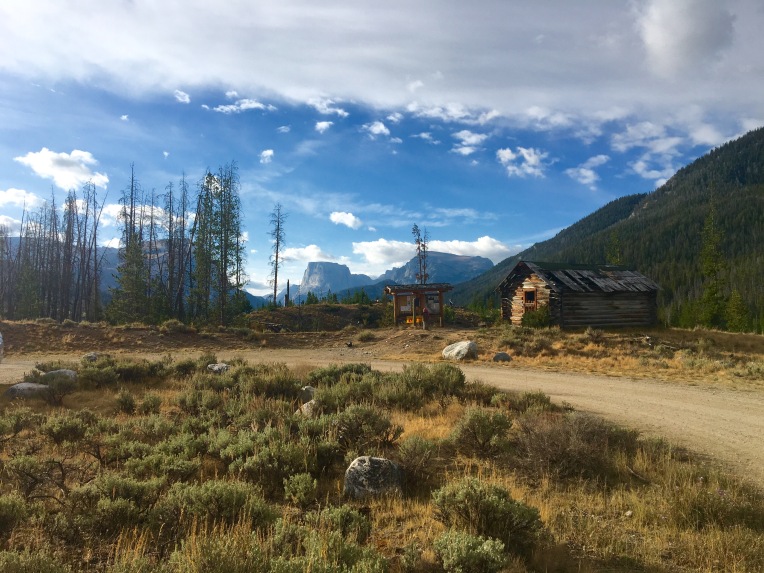
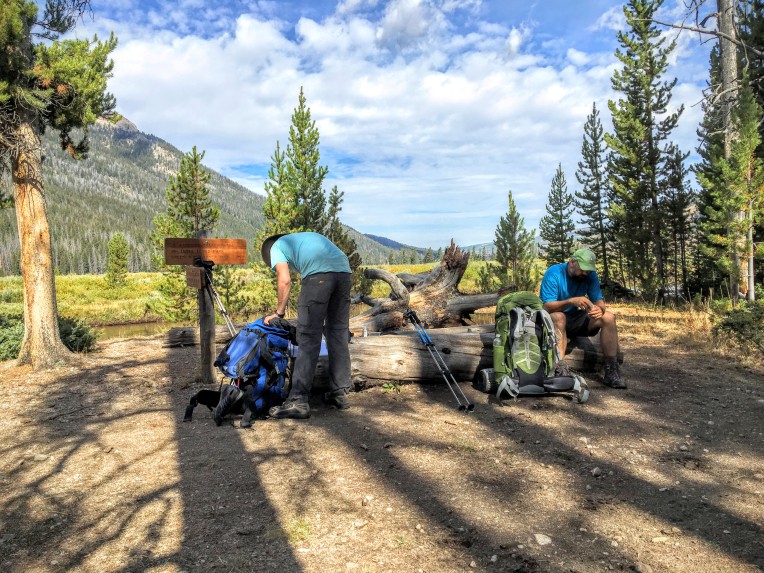
We popped out of the woods and into the parking lot close to Trail’s End Campground.  We were not intending to camp there, but were looking to hitchhike back to Pinedale for the night.  Our vehicle was still at the Green River Lake parking lot.  The unfortunate part of ending our hike at Trail’s End Campground without a vehicle was that this road was sparsely traveled… and the people who actual did drive by were… surprise, surprise… coming back to camp for the evening and NOT going to Pinedale.  We had a couple of people stop, but they were unwilling to drive us into town.  Cell coverage was terrible and extremely spotty, but one of the guys was able to text his wife and ask her to get a shuttle set up for us.  Unfortunately, communication between us and the shuttle service completely broke down and they said that the earliest they could get us (even if they wanted to) was 11pm.  This was strange because we were only a 30-minute drive from them.  We think they were unclear on where we actually were.  To our complete dismay, we were planning to camp in the parking lot, but then… all of a sudden… a truck slowly turned on to our road.  With three of our guys working at the corporate headquarters of Cummins Engine Company in Columbus, Indiana… they were surprised and blown away that the driver of the truck not only had a Cummins engine in his truck… he was wearing a Cummins baseball cap.  The stars aligned.  As it turned out, the man, his wife, and daughter came up to that area to release balloons in remeberance of the daughter’s husband who had passed away a year from that date.  They had just finished when they decided to just crusie around and look at the views before they went back to Pinedale.  They very kindly loaded five guys, five packs into the covered bed of the truck and we were off to Pinedale.  There are still some amazing people in this world and we were fortunate to have crossed paths with them.

img_5119img_1679


Wyoming: Wind River Range- Green River Lake to Three Forks Park- Day 1

img_1237-2

Wyoming: Wind River Range- Green River Lake to Three Forks Park

Total Mileage- 10.74 miles

Total Elevation Gain- 2033 feet

Total Elevation Loss- 2004 feet

screen-shot-2016-12-07-at-5-58-02-pm

screen-shot-2016-12-10-at-6-31-42-pm

Let’s start out with the fact that we had to alter our trip on Day 3 because we were unable to hit Bonney Pass due to ice and snow.  I will discuss this more on the Day 3 post, but if you are looking for a loop route that hits a significant portion of the Sierra High Route, you won’t find it here.  We took the conservative options and readjusted our route, opting not to test Mother Nature.  I believe that we attempted this route a week too late, as we started Day 1 on September 3.  Typically the first heavy snowfall doesn’t hit until the middle of the month.

Day 1 was beautiful as we approached Green River Lakes parking lot.  It was everything we hoped it would be- mid-60 degree weather with no bugs, blue skies, white puffy clouds.  We believed that the first week of September would be the sweet spot with no bugs, cool days/cold nights, and little to no snow.  We typically anchor our trips to Labor Day so we save a vacation day, however starting on this particular weekend meant more human activity than we really wanted.  We always hope for complete solitude, but everyone was no doubt trying to get in their last trip before the snow.  In retrospect, we should have considered the last week of August.  Had we done that we likely would have eliminated some of the people traffic and avoided the first big snow of the season.

img_1187img_1188img_1190img_1206

Our goal for Day 1 was to hit Three Forks Park (10.7 miles), which is a really nice, open basin area with plenty of camping opportunities at the confluence of Green River, Wells Creek, and Clark Creek.  As we left the Green River parking lot there were spectacular views of Square Top Mountain.  There are a couple of trail options from the parking lot.  We opted for Lakeside Trail that hugged the west side of the first lake.  There is also a trail on the east side of the lake that is a more direct route.  The east side trail is Highline Trail, also labeled Continental Divide Trail.  Either trail works.  If you take Lakeside Trail there is an eastward cut-across after the first lake that takes you over to Highline Trail.  While we had amazing views on Lakeside Trail, I would probably recommend taking the eastward trail simply because it is more direct and you may get better views of Square Top.

img_1220 img_1225 img_1234

After the eastward cut-across, we took a quick snack break.  We were at about the 3.5 mile mark.  The next three miles were relatively flat (a few ups and downs) with great views of Flattop Mountain and the second Green Lake.  The waters are an absolutely stunning Caribbean blue in which you can actually see fish swimming.  Later on the trip we stripped down and jumped in one of the lakes (more on that later), but the water temps in early September were in the 40’s.  Nice and shockingly cold.  The trail was well-established and visible worn for easy backpacking.
img_1236 img_1237-2 img_1242 img_1251 img_1258 img_1271 img_1747

The final three miles to Three Forks Park were a gradual ascent.  Overall, this was a very leisurely and beautiful 10.7 miles.  We averaged just under 2mph and it took us a little over six hours.  We could have very easily gone faster, but we took our time and enjoyed the views.  Three Forks Park is a really nice, open meadowy area with many camping options.  The only downside was that there were quite a few people camping in the area.  There were a couple of backpacking groups and then another group with horses, big tents, and a dog.  All in all it wasn’t too bad and didn’t distract us too much, but there is always this yearning to just get away from crowds and have complete solitude.  Again, this was a holiday weekend so we had to expect this.  Also, the popularity of the area has really grown over the years with more exposure and people talking about it.

img_1252img_1275img_1279img_1280 img_1281img_1282

Day Two will take us south and then eastward just passed Peak Lake where we had our most unpredictable night.

Notice Every Detail of Creation…

This excerpt is from the post Thanksgiving at my other blog brandonandress.com.  I thought this portion was a perfect perspective for those of us who love nature and the outdoors.
The Spirit cries out to me: See the wonder! See the glory! See the beauty! And move forward in awe!

Listen.

Smell.

Feel.

Take it all in and delight. Let the wind blow at your back and let the sun shine down on your face.

Listen to the conversations.
Joy in the laughter of your children.
Celebrate that you can give your baby a bath.
Delight in the songs of the birds and the rustling of the leaves.
Be enveloped by everything and everyone around you.
Count your blessings.

Smell the autumn fragrance.
Let the preparation of your meal be a prayer and a blessing.
Savor every bite as if it is your very first.
Feel the textures.
Let the work of your hands be praise.
Count your blessings.

Sit in the woods and notice every detail of creation.
Close your eyes and absorb every note and harmony.
Glory in every drop of your morning coffee.
Embrace the touch of another.
Join in the chorus of all creation in praise.
Count your blessings.

Can any one of us even utter a grumble…in the midst of creation’s immeasurable wonder?

It is good.
It is good.
It is good.

From the depths of my soul and with every breath…thank you God. I am an unworthy man.

Preparing for a Glacier National Park Backcountry Hike…

As I have mentioned in previous posts, a successful week-long hike is planned several months in advance (maybe even up to a year based upon the demanding logistics).

Planning in Advance

To give you an example, when we arrived at Glacier National Park for our 60+ mile North Circle Route hike the park ranger issuing our backcountry permit exclaimed, “Wow. By looking at your itinerary you guys must have planned way in advance to have such an amazing trip lined up.” He absolutely nailed it. We did plan way in advance. We had the most envious permit in the entire park because our research and planning began almost an entire year before our trip.

After researching and selecting our route a year in advance, we knew that the only way to secure this particular trip and get a permit would be to submit our application as soon as the early submission window opened. The Backcountry Office states that all early registrations are selected randomly… but you can not convince me that there isn’t a benefit for getting the application in at the beginning of the window. The window opened January 1st and I made sure that our application was on their desk on January 1st (which meant I sent it a bit early). We not only got the most sought after loop in Montana but we also got TWO backcountry campsites at each destination. Every single destination that we submitted along the trail was approved “as-is.” Maybe we got the luck of the draw… who knows… but I think that good planning and getting the application in at the beginning of the window got us the spots.

Planning Meetings

We had three planning meetings leading up to our trip to Glacier. I know that some may think that all of the planning is overkill but I can assure you that it isn’t. I wish I could document every story of every knuckle-head that we have encountered on the trails who hasn’t planned well.

On this Glacier hike we had a guy come up to our tent and ask if we knew the signs of hypothermia. His buddy was hiking down the mountainside and was in bad shape. Come to find out that he was from Florida and had not taken elevation into account, had not dressed appropriately, and did not plan for rain and 45 degrees.

Careful and meticulous planning will keep you from being a knuckle-head. Of course accidents can happen to anyone… but set yourself up to eliminate as much risk as you possibly can through careful and meticulous planning. You will thank me for that piece of wisdom.

Go over your route together. Look at the mileage and elevation profiles of the routes. Do research about the the average seasonal temperatures and call the Backcountry Office with questions. Talk about how many calories you will burn per day and how much food you will need to pack. Discuss safety procedures if you encounter wild animals or if someone gets hurt. Put together a recommended list if gear and comb through it together.

Do not think you can go over this stuff too much… because you can’t.

Gear

Speaking of gear… only take what you will REALISTICALLY NEED. Once you have an idea about the seasonal temp… only pack what you will minimally need. Pair up with a buddy and share items like water filters and stoves. Break up the components of your tent so that the weight is shared equally. These are some great ways to reduce your pack weight.

For our seven night, eight day hike we were shooting for our total pack weight to be below 35 pounds (without water). If you consider that food weight will be between 10-15 pounds for that duration, your backpack and gear ought to be 20-25 pounds or less. I found this to be realistic, as I shared items and only packed essentials.

The temptation for hiking newbies is to disregard good advice and pack way more than what they will realistically need. Yes… I have stories about this as well. Just trust me. Once you begin lugging around 5-15 extra pounds (that you shouldn’t be carrying) for several days, across many miles, up and down mountainsides… you will have wished you packed minimally.

Food

Packing 8 days of food in which you need at least 3000 calories a day can really add significant weight. I may write a post specific to food in a later post so I will keep this one short.

I have changed my overall approach to eating on extended hiking trips. Rather than plan for three squares per day… I now eat all day long. Sure I still have breakfast, lunch, and supper but in order to maintain my energy level I always have something to eat in my pocket. I am not a big eater so this was difficult for me at first. But as the days passed I found that it was a brilliant strategy and it got easier each day.

I had a nice mix of carbs, protein, and fats. I shot for 3200 calories each day and was able to accomplish that with 9.6 pounds of food. In our group I was definitely on the light side… but I also didn’t come home with any leftover food. Perfect planning!

Spend a significant amount of time researching food and putting together your eating list. Go after foods that have a high calorie to weight ratio (calories per gram). Packing calorie dense foods (in my opinion) is a great way to manage how much food you end up carrying on your hike.

Day by Day Summary

Over the next few weeks I will begin detailing each day of our 7 night, 8 day hike along the North Circle route in Glacier National Park (Montana).

If you have anything to add or if you have any specific questions, feel free to ask.

peace…

brandon

Utah: Canyonlands National Park- Mountain Biking the Colorado River Overlook 4×4 Road

Canyonlands National Park has some of the best terrain for mountain biking.  Our plan was to enter the southeast portion of the park in an area called The Needles.  We heard that there were some amazing areas to mountain bike but we thought the best option would be to ask one of the park rangers upon entering the park.  As we reached the park entrance and shared some details with the ranger, she told us that the best mountain biking was a 4×4 road (marked below in yellow)that leads to an overlook of the Colorado River.  She noted that, while this road was some of the best mountain biking in the park, it was not heavily traveled by bikers.  This really got us excited because we do not prefer fighting crowds of people.  With too many people in an area you lose the serenity and peacefulness of the experience.

4x4 Trail Canyonlands


We parked in the Needles Visitors Center parking lot and prepped our bikes for the 16-mile round trip trek.  We were not quite sure what to expect but by just looking at where this dirt road was heading… it looked unreal.

IMG_3779


IMG_3780


The first thing I noticed (other than the phenomenal horizon) was that the sand road was packed really well from the 4×4’s.  This made riding on it very easy.  There were definitely areas where it wasn’t packed as well and it made pedaling a bit harder… but there were only small stretches in which this was the case.  In the first quarter mile Patrick thought he forgot to lock the van so he rode back to lock it.  That enabled me to do some climbing around while he was gone.

IMG_5650

IMG_5652


IMG_3783


IMG_5655


IMG_5660


The eight mile journey to the Colorado River overlook took us a few hours.  Not because it was a slow ride but that we stopped so many times to look at the views.  To our left at on point in the journey there was an amazing rock area on which to ride around, again with amazing views.

IMG_5675


IMG_5673


The immense canyon area was getting closer and it seemed as if we were getting close to the end.  We stopped to take in the view on this 75 degree day and to also have a bite to eat.  We didn’t know that we still had a couple of miles to the end and some of the roughest trail to still cover.  If you ever take this road it would be advised to take a bike with shocks.  Your entire body will thank you.

IMG_5677


IMG_3797


IMG_5679


IMG_3808


The final stretch was primarily rock with cairns leading the way.  It was not a particularly tough stretch to navigate but the rocks were so pock-marked that it felt as if we where riding jack hammers.  A mile of that really takes a toll on wrists and shoulders, even with shocks.  The payoff of the trail was a breath-taking view high above the Colorado River.  The drop off was about 2500 feet and all you could do was stare at it and take it all in.  There were four other bikers at the overlook- two couples (a father and son and their wives).  The father and mother were in their mid-60’s and completely impressed us with their sense of adventure.  This was not an easy eight-mile road by any stretch of the imagination… so they certainly had our admiration.

IMG_5686

IMG_5688


IMG_3820

IMG_5697


The 4×4 road leading to the Colorado River Overlook in The Needles area of Canyonlands National Park is unbelievable.  Of all the trips I have taken and activities of which I have participated, this ranks at the very top of my list in term of how much fun I had.  The views are picturesque.  The road is diverse and challenging.  And the payoff is an awesome stretch of canyon overlooks.  The experience is nothing short of spiritual.  It is just you and creation.  Nothing else.  If you are in Utah… don’t miss this opportunity.

peace…

brandon

Utah: Canyonlands National Park- Upheaval Dome Syncline Trail

After we finished the Grand View Point Trail we drove to Upheaval Dome for the highlight of the day’s activities, Syncline Trail in Canyonlands National Park.

IMG_5444Upheaval Dome is believed to have been created by the impact of a meteorite, as you can see from the crater and concentric circles in the picture above.  Syncline trail is a loop trail that follows the perimeter of Upheaval Dome for 8.3 miles, opening up midway through the hike.  This particular hike takes about 6-8 hours and would classify as strenuous, involving quite a bit of scrambling.  The trail is marked by cairns for the duration of the hike.  The trailhead starts at 5680 feet elevation and slowly descends over 1000 feet for the first half of the hike.

IMG_5448

IMG_5575

IMG_5462

I have to admit, from everything I have read about this trail, that April is the perfect time to be in this area and an ideal time to hike this particular trail.  July temps easily reach in the 90-100’s.  That would make me reconsider what time of day I would attempt to hike this trail and what I would pack (like a gallon of water).  Our April hike stayed in the mid-60’s and allowed us to pack a couple of liters of water.

IMG_5481

IMG_3708

The stunning beauty of this desert area is comprised primarily of sandstone and shale, which make for some amazing formations and sights.  There was one particular area (picture below) where we sat down and just took it all in.  It was absolutely quiet, not a sound to be heard… just complete stillness.  Such artistry in what we saw and the stillness of being enveloped by all of it.  A person does not get to experience that very often.  It was heavenly.

IMG_3712

IMG_3715

IMG_5501

No… Patrick was not drinking the water!  It was staged.

IMG_5528

IMG_3750

IMG_3727

IMG_5518

At the midpoint of the hike it open up with the opportunity to take a trail to the center of the crater.  Although we initially wanted to take that trail, we realized that the first half of the hike took longer than we had anticipated… because we stopped for so many pictures!  We decided to not make any stops for the second half of the trail so that we could finish in reasonable time.  Take note: if you travel counter-clockwise on this trail… the most strenuous portion is the last mile with a 2000 foot vertical ascent to get back to the parking lot.  Needless to say, I didn’t take many pictures during this time.

IMG_5556

IMG_5576

IMG_3758

Syncline Trail, which loops around Upheaval Dome in Canyonlands National Park, is an absolutely amazing and rewarding 8 mile hike that will not only give you an amazing full body workout because of the hiking and scrambling, but an opportunity to see views and formations that will give you glimpses of heaven.  I highly, highly recommend this hike.

Brandon

Utah: Canyonlands National Park- Grand View Point

We took a somewhat spontaneous trip to Utah at the end of April.  It was meant to be a very quick trip, leaving Indiana on a Wednesday night and driving straight through to Moab, Utah.  We arrived on Thursday afternoon with plans to hike all day Friday, mountain bike all day Saturday, and then drive through Arches National Park on Sunday (leaving for Indiana late Sunday night).

As a side note, I was a bit nervous as we traveled west through Kansas and Colorado because it was, not only in the low 30’s, but snowing.  I packed as if the temps were going to be in the 50-60’s, so needless to say I was a bit cold when we made a stop in western Kansas with the temperature at 28 degrees.  Fortunately as we passed into Utah the temperatures and weather normalized.  The temperature ranged from a high in the 70’s to a low in the mid 40’s, which was very nice.

On Friday morning we decided to hit a very short, and not very taxing, two mile roundtrip hike in Canyonlands called Grand View Point.  On the map below you will notice a large Y in the middle of the park.  This hike is located at the very bottom of the Y.    While this hike is leisurely enough for families it should be noted that there are NOT guard rails.  Caution should be used with small children.

Map_of_Canyonlands_National_Park

IMG_5383

Grand View Point in Canyonlands National Park

IMG_5391

When hiking Grand View Point you may want to pack a little bit of water.  Granted, it is only a short two mile “in and back” hike from the parking lot, but it will take you longer to finish this hike than you might expect- because you will want to take a million pictures.  Every step of the hike is full of stunning beauty.

IMG_5398

IMG_5405

IMG_5417

At the end of this trail, there is an amazing payoff (as if the whole hike wasn’t enough).  For those willing to do a bit of climbing up some large boulders… the view is UNBELIEVABLE.  You don’t have to climb the rocks to experience the view, but I recommend it.

IMG_3676

IMG_3677

IMG_3687If you are in the Canyonland National Park, do yourself a favor and hit the Grand View Point trail.  You will not regret it!

Next post Upheaval Dome Syncline Trail- Canyonlands National Park

Brandon

Indiana: Knobstone Trail- Elk Creek to Delaney

I will be updating live throughout the day as we hike a 15-mile section of the Knobstone Trail in southern Indiana.

The entire Knobstone Trail is about 40 miles. Two weekends ago, a couple of the guys went out to tackle the entire trail. It was an ambitious goal for a few reasons. Of course it was very cold and snowing, which made the conditions quite muddy, but there was an even greater obstacle: elevation.

I know that sounds crazy because Indiana is vertically challenged. But, I am dead serious. Over the 40 mile hike the total elevation gain is 10,500 feet. I know, I know that is insane! That is as much elevation gain as we did in July in the Rocky Mountains. But that just proves how hilly this portion of trail is in southern Indiana.

The guys covered approximately 25 miles before calling it quits because of the conditions. I am joining them today to finish the final 15 miles.

7:15 AM- leaving Columbus, Indiana

8:15 AM- From I-65 we dropped off one car at Delaney Park. It was about 10 miles off of I-65 and took about 30 minutes to get to the park.

What a beautiful drive. The sun was rising over the hills. We left Columbus with Thunderstorms and 41 degrees. Looking at clear skies now and already 56 degrees. Fantastic day for a hike!

20130316-084404.jpg

9:00 AM- Starting at Elk Creek. Beautiful, beautiful morning.

20130316-085651.jpg

First 15 minutes greeted us with a nice 200 ascent. Stopped to zip off the legs. Already 60 degrees.

20130316-092216.jpg

9:40 AM- Nice breeze. Rewarding hike.

20130316-094138.jpg

10:05 AM- This is NOT a trail for beginners or for families or anyone out of shape. The ascents and descents are rigorous. Definitely pushing me early.

20130316-104933.jpg

11:40 PM- The reason the early ascents and descents were so rough was because there are no switchbacks anywhere. It is point A to point B. I am going to refer to this trail as The Good Ole Boy trail.

Pretty trail though. Not any green yet. Still too early. Looks like Fall. On a trail deviation right now due to the tornado last year. Probably at the six or seven mile mark.

Well the deviation only took us to mile 38 (which is only 5 miles). A lot of deviation walking with little return!

1:23 PM- Right before mile marker 40 Patrick said that other than the first three ascents.. this trail is pretty good. After marker 40… we hit the toughest ascent. Woof. We have about five miles remaining.

20130316-132538.jpg

3:01 PM- Getting close to the end. I will write a summary when I get home. BUT just after mile marker 43 we hit the beast. It went STRAIGHT up and definitely was a hard way to end.

SUMMARY

IMG_5123

As you can see from the elevation chart above, the Knobstone Trail has many peaks and valleys, which make the overall elevation gain over 45 miles significant.  For this particular trip we started at the third red line around the 32 mile marker and finished at around the 46 mile marker.

We started around 9 AM with the temperature right at 60 degrees.  Quickly into the hike we each had to loose some clothing.  We had a constant 20 mph breeze that accompanied us over the 15 miles.

The greatest challenge was the lack of switchbacks and you should make a note of this.  Hiking a straight shot up a hill (and going down) at a 65 degree angle will test your stamina and your knees and ankles.

The greatest head-scratcher was around the 37/38 mile marker.  We descended over 150 feet straight down, turned to our left, and then the trail went back up to the ridge from which we had just descended.  As soon as we got back to the top, the trail went immediately back down.  It was incredibly frustrating and redundant.  We could not understand why they did that.  We thought we were on a hidden camera show.

Ultimately, this portion of the Knobstone Trail is quite enjoyable and worth the effort.  There were several areas where it leveled out and afforded some leisurely hiking.  I wish the area would have been greener but it was still early.  A few more views of the rolling hills would have been nice, but I really enjoyed my time there.  This is definitely a unique area in Southern Indiana to get opportunities for significant elevation.  I can see why so many use this as a training ground for the Appalachian Trail (AT).

brandon

Indiana: Charles Deam Wilderness- Peninsula Trail

We recently took a weekend guys hiking/camping trip to Charles Deam Wilderness, which is south of Bloomington, Indiana and nestled right up against the Hoosier National Forestry. If you remember… a handful of us braved a single-digit weekend excursion to Deam this past January, putting all of our survival skills to the test! In January, we navigated Axsom Branch as well as portions of Grubb Ridge Loop. This time we set out without any sort of plan, except that we wanted to spend some time on Monroe Lake.

We parked at the parking lot southwest of Axsom Branch and headed northwest on Grubb Ridge Loop. Being that we started the hike in the evening, we didn’t want to be too ambitious. Our goal was to set up camp close to the split of Grubb Ridge Loop trail and the Peninsula Trail. The temperature that autumn evening was a fantastic and cool low 60’s with a low overnight in the high 40’s (perfect Indiana camping weather). We set up the tents in a really nice area with thick pine needle covering and spent the late evening around a fire.

The next morning we decided to continue on the Peninsula Trail until we hit the end of the trail at Monroe Lake. We took our time packing up and got a late morning start. With no agenda, our only goal was to enjoy our time venturing through the wilderness. With many of our trips it seems as if we are always moving and trying to get to the next destination at a reasonable time to set up before sun down. It was actually really nice to take our time. It was around noon when we made it to the end of the trail at Monroe Lake. As I looked out into the lake I saw what appeared to be an island about 1/2 mile offshore. I jokingly commented that we ought to swim out to it. And of course a few guys got really serious about it. For the next ten minutes they were just waiting for someone else to say let’s do it! I finally began to take off my boots and socks, “Let’s do it boys.” We stripped and gingerly made our way over the jagged rocks to the lake’s edge. We began to wade slowly into the cool water and then just began to swim. Our amateur voyage to the island took about 40 minutes and we were all glad that the swim was over. We walked on the other bank, looked at each other, and then wondered aloud how we were going to get back to the other side.

Never one to do more physical work when I can use my brain to avoid work, I suggested that we wave down one of the boats on the lake to take us back to the other side. Being that is was turning into a really nice afternoon, the lake activity was beginning to pick up. Our first victims came over in their speed boat and assured us that they had no interest in disrupting their fishing expedition to take us to the other side. Not to be disheartened, we began to wave down a pontoon boat that was around the bend of the lake. We thought it was unlikely that they would see us, but we began to hear cackling and merriment and knew that our arm-waving had become a source of great entertainment. Fortunately enough for us, the pontoon began to creep in our direction…and the jovial uproar grew. It was infectious, as we began to laugh as well. And we laughed even harder when we realized the boat was full of 50-60 year old ladies who had been imbibing the spirits as breakfast and lunch. Needless to say, they were more than happy to pick up some hapless, beleaguered, and shirtless hunks on beach. We boarded… became the focal point of all sloshy conversation, and then were greeted by heckles and jeers from the rest of our contingency. What a story. Too bad we don’t have photos of that huh? : )

After lunch, we decided to stay along the lake side and hike to one of the campsites on Monroe Lake.

This was a stunningly beautiful hike along the lake. The sun brought out all of the early fall vibrancy- the yellows, greens, and browns. Just being able to breath deep and enjoy such beauty recharges one’s batteries and refills one’s soul. As much as I would highly recommend this particular hike and route, there were a couple of things to take into account. Our decision to hike along the lake overall was a good idea because we didn’t have to backtrack at the peninsula. However, there were about four areas where we no longer had a path to walk so we had to hike up the steep hill, walk through the woods, and then back down to a walkable path on the lake’s edge. Maybe the greatest challenge hiking along the lake’s edge was when the terrain turned almost exclusively into an angled pathway comprised of wet shale rock. It was incredibly slick and we had at least two or three guys slip and fall. The final thing to take into account is pumping water. We brought our pumps and at our final camping destination we went into the lake to pump. It was a slow and laborious process because the water was so green that we had to clean our filters several times to get a few bottles of water.

Nonetheless, the sunset on Monroe Lake was exquisite and it was a joy to watch it settle in behind such a magnificent backdrop.

peace…

brandon